ROCKKRAWLER 7” long arm install
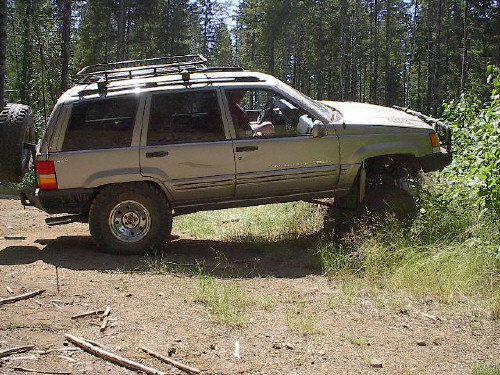
We recently replaced my wife’s 1993 Jeep Grand Cherokee that was lifted about 6” with a 1998 5.9 Grand Cherokee. We had been getting the 1993 ready for GSNW 2002 which was 8 weeks away.
We were unsure of what we were going to do for the lift , we had debated pulling the lift off of the old Jeep, purchasing a replacement RE 4.5” with 2” spacers, Clayton’s long arm and even fabricating our own long arms. We decided if we were going to lift it we wanted to do it once (or at least less than 5 times) the last jeep had used about 5 different lift configurations over the years starting with a Rancho 3” then spacers, then bigger spacers, then a early Tera with spacers which netted about 6”.
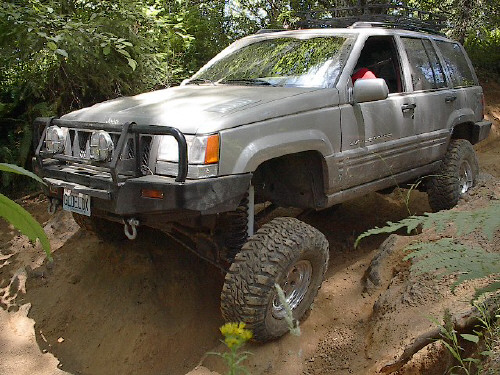
With only 8 weeks we decided to try something new, the RK 7” kit. It was the most complete lift kit I am aware of including a Drop Pitman arm and even a new rear brake line.
Following are pictures and details of the installation, there are some things that I will probably change even though there have been no issues with the strength or integrity of the kit. The first thing I noticed was how heavy the components are, for example the arms are not tubing they are solid, the rear tri-link plate and mounting brackets are all
¼“.
The kit includes:
7” front springs
7” rear springs
4 shocks
front and rear stainless steele brake lines
4 lower long arms (solid not tube)
1 rear upper “tri link” arm and mounting plate
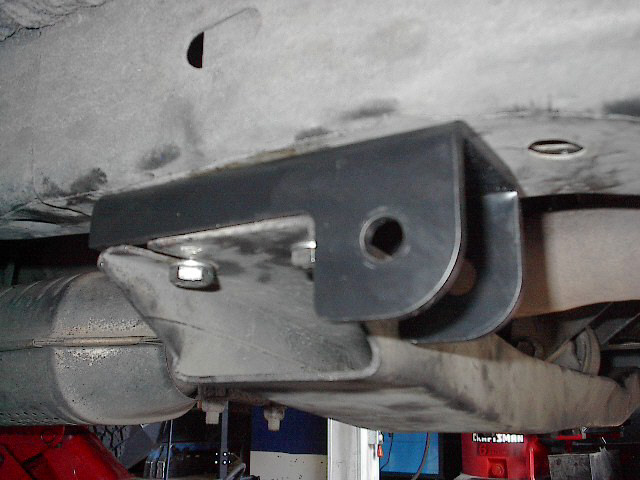
1 front upper torque arm and bracket (this sets the pinion angle and caster)
front trackbar and drop bracket
drop pitman arm
front and rear lower control arm brackets
sway bar disconnects (front)
mounting hardware
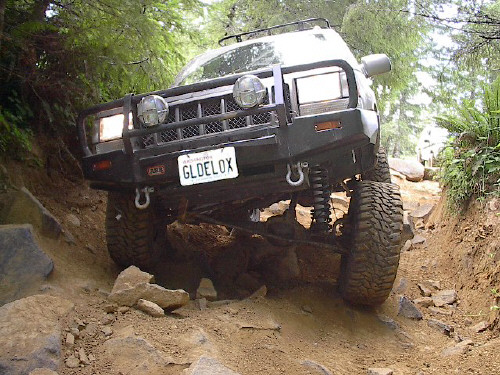
This is a fairly involved installation we have a well supplied shop including air tools, welder etc. Welding and cutting are involved! The integrity of this lift relies on strong welds.
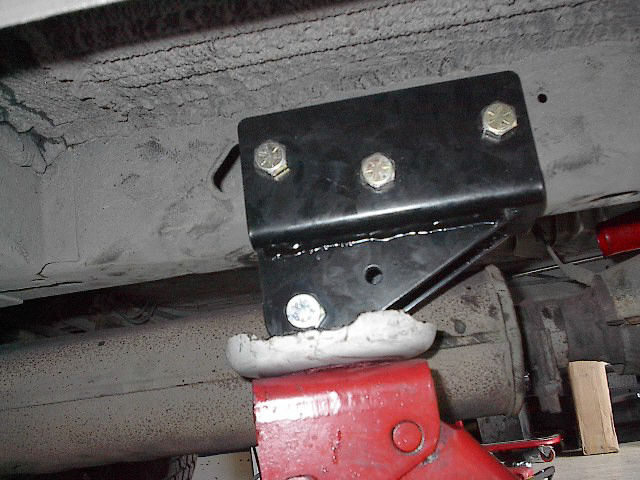
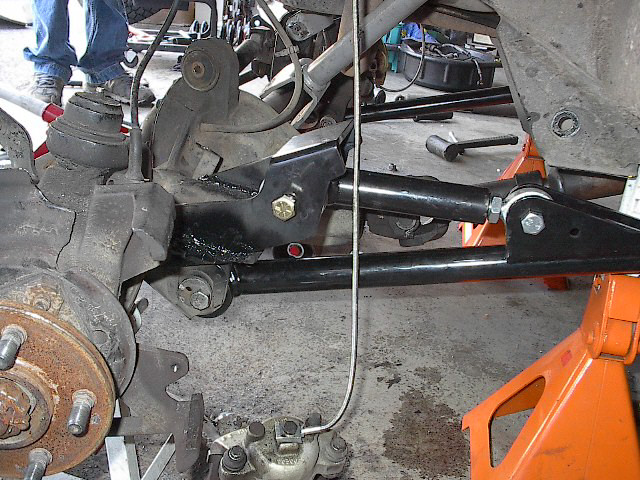
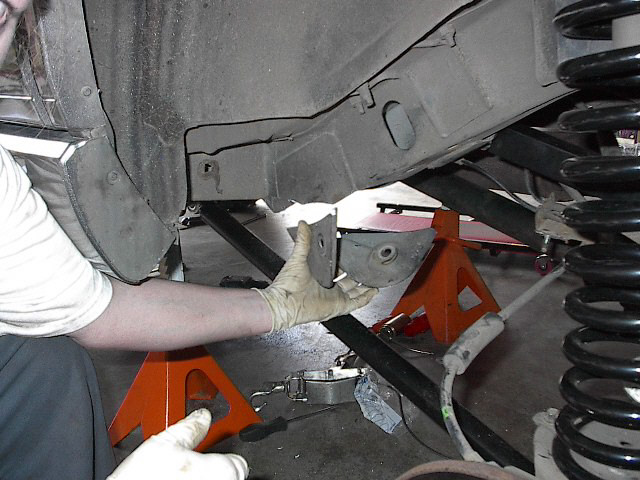
We began by mounting the lower control arm brackets, the front lower mounts bolt in at the cross member mounts and are sandwiched between the cross member and the uni frame (these will be welded in later so that the cross member can be removed without removing the mounts, this will also strengthen the mounting).
The lower rear arm mounts sandwich the rear uni-frame and are aligned using factory holes. These are bolted in which had me a tad nervous at first, but still no problems. Later I will probably go back and weld in a subframe to attach the front and rear control arm brackets for my own peace of mind.
Once the brackets are in the the actual “lifting” begins much of this will be similar to a regular lift so we won’t spend a lot of time going over normal procedures. We began by supporting the front of the Jeep on jackstands at the frame just behind the factory lower arm brackets (tall jackstands or a lift are a huge benefit when installing this lift).
 (click to enlarge)
Front lower mount bolted in not welded
rear
The lower stock lower arms, shocks, springs, track
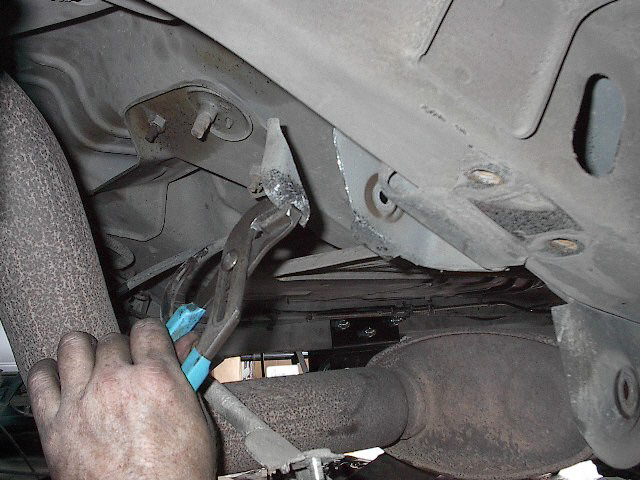
bar and drag link (at pitman arm) were removed. At this point we also replaced
the factory brake lines with the supplied SS lines. This left room to weld in
the “torque arm” bracket it is aligned using the factory ABS line bracket
mounting holes and then welded in. At this point we attached all the front
control arms and the torque arm, we also replaced the factory track bar bracket
with the RK drop bracket . Now comes the fun part installing the springs we had
the front axle supported by a floor jack, by simply lowering the jack the 7”
springs slid right in. The pitman arm, track bar shocks etc are replaced.
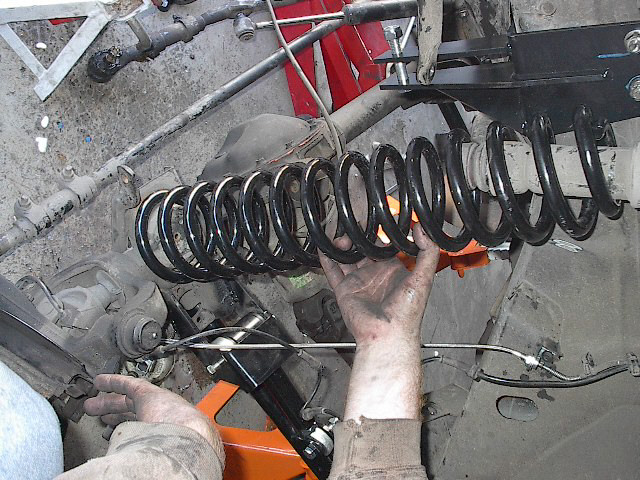
No prying, pushing just slides right in!
Driver side Torque arm installed
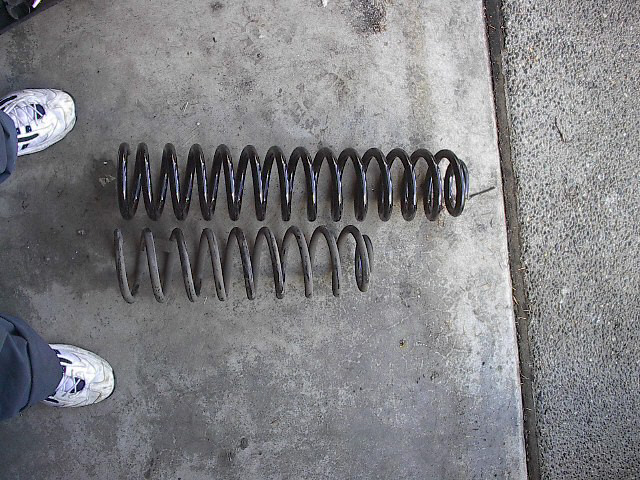
Front springs comparasin
The rear was handled similiarly, the long lower arms were installed then factory upper arms, track bar, sway bar are removed. The stock upper control arm brackets may need to be trimmed:
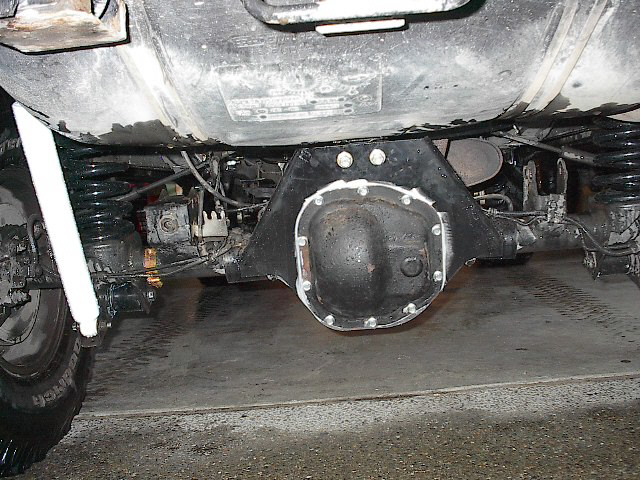
The rear tri link plate is bolted in sandwiched between the rear diff and diff cover, two half circle brackets are u-bolted in and then welded to the tri link plate allowing the rear diff to be serviced without affecting the rear suspension. The tri link locates the axle side to side with spacers. It attaches using the stock upper mounts and then the center of the plate. The springs, shocks and brake lines are then replaced.
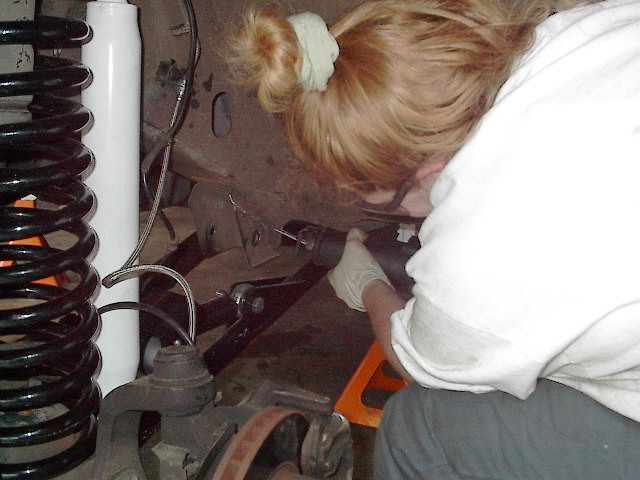
Fun stuff the lower control arm brackets are now removed. Melissa got to do this because it was her Jeep.
.
Now comes the adjusting, we used many reference points to be sure the axles were centered and straight (very easy to be “cocked”) one person is able to move the axle when lengthening a lower arm by pushing on the tire-nothing like trying to force a short arm in. The only exeption is passenger side with the torque arm.
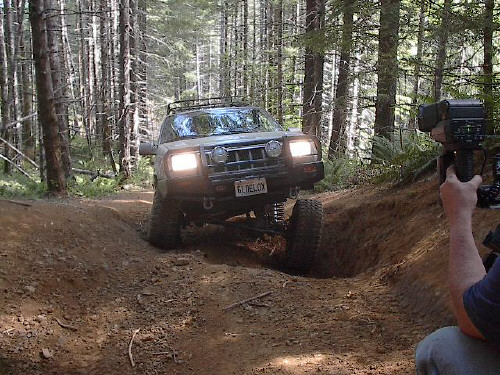
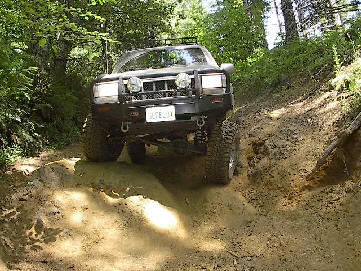
The ride is nice and smooth, surprisingly quiet for all the heim joints, they do get louder over time. The sway bar disconnects are surprisingly quiet, and are the easiest I have used or seen used to disconnect and reconnect they even went back on after the lower sway bar bracket was bent out about 2”.
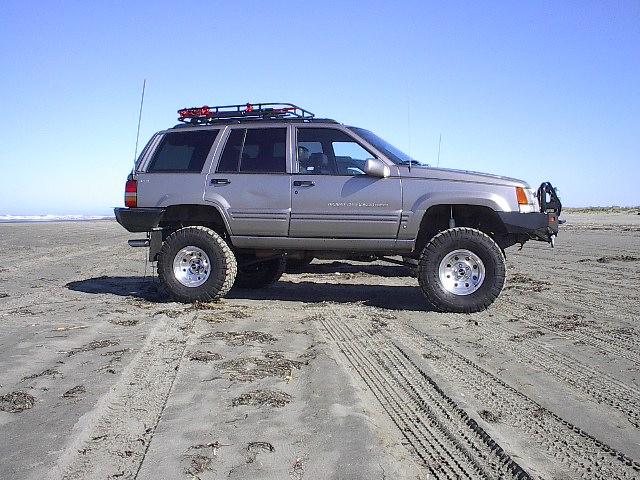
This is our daily driver, my wife loves the ride although it obviously does not handle like stock or even mild lifts.
3 months on and we have had no problems, The only “break” on a trail run was dropping a little too hard onto a rock with the rear differentional and breaking the seal with the rear tri link plate and differential housing a little pounding with a hammer and some RTV sealed it up. We still need to grind it flush with the housing.
We are extremely pleased with the components and quality of the kit. Some things that we will probably be changing:
Longer rear shocks along with longer upper spring mounts in the rear.
Building subframe to attach front and rear control arm brackets
The front lower control arm brackets drop the cross member approx ¾” I would prefer the cross member to be flush (similar to the XJ bracket)
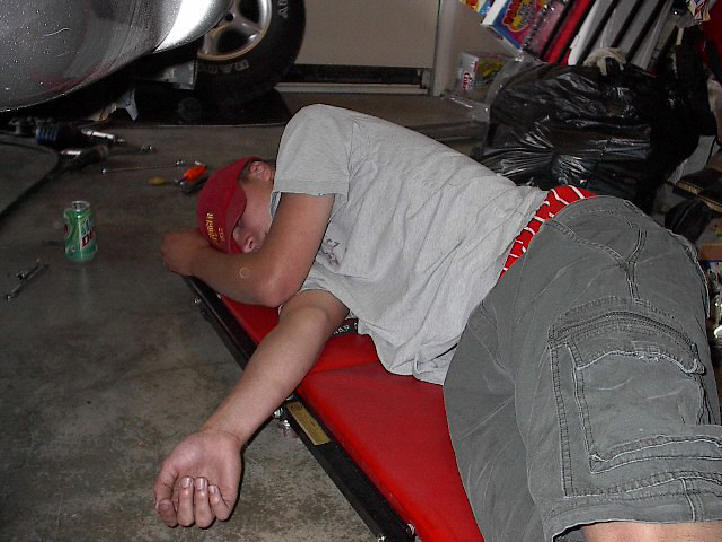
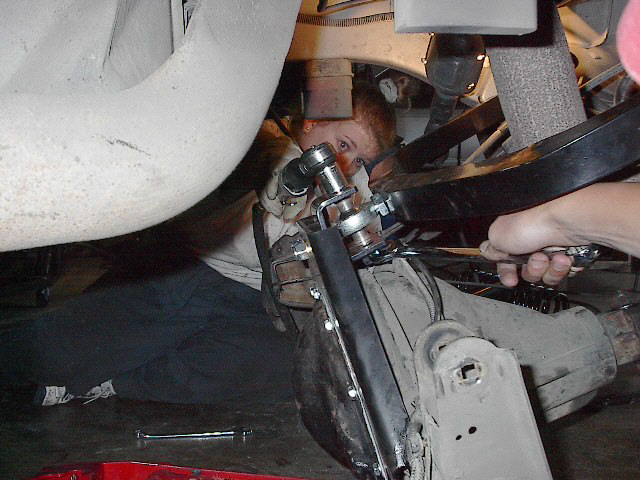
It is a pretty exhausting job, here is a shot of one of my helpers.
Some pictures:
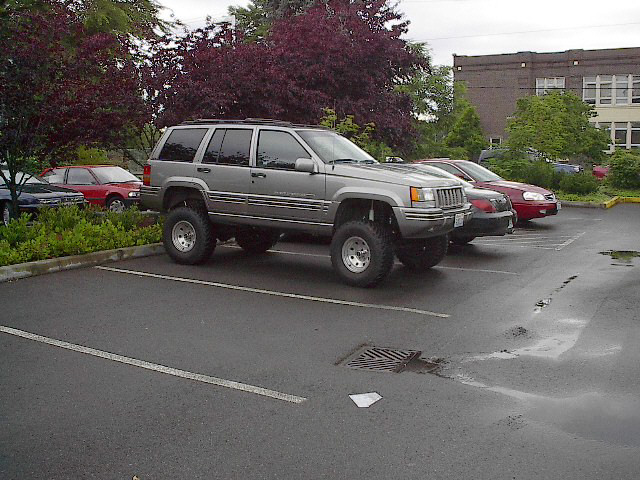
Still not adjusted running on 32”